Stores
General
Details
ID: This is an ID issued by the system to identify the store. Please share it when you contact us.
Store name: This is the name of the store as registered in the system.
Created at: The date and time when the store was created in the system.
Notifications
Notify merchant on transaction: After a transaction, an email will be sent to your registered email address.
Notify customer on transaction: After a transaction, an email will be sent to the customer email address.
Branding
You can set here the icon image to be displayed on the checkout widget.
We recommend using a square image but you adjust the image after having selected it.
Payment services
Charges
Percent fee (%): Contract fee rate.
Recurring type: Shows whether recurring tokens can be used and under which limits.
Flat fee: Processing fee per payment.
Subscriptions
Installments: Shows whether subscriptions with installments can be used.
Payment methods
Card payments
Credit card payments: You can choose whether to accept credit card payments.
Prepaid card: You can choose whether to accept payments with prepaid cards.
Debit card: You can choose whether to accept payments with debit cards.
Foreign cards: You can choose whether to accept payments with foreign cards.
Card brands: You can choose which brands to accept payments from.
Allowed countries: You can choose which countries to accept payments from (based on the user’s IP address).
Fail on new email: You can prevent transactions from email addresses that have never been used.
QR code
Scan customer QR code: You can choose whether to support over-the-counter QR code payment.
Others
Online payments: You can choose whether to support online payments (Alipay / PayPay).
Please note you can’t set up which online payment methods to accept in this section.
EC checkouts
In the “EC checkouts” you can configure the settings for the Widget, Inline checkout and EC link form.
Widget
HTML
You can create HTML code for the widget by selecting the options you need.
About PayPay online
Please select “Payment” as the checkout setting and “One-time” as the token type.
Other options are not currently supported.
Since PayPay online does not require user information at the time of payment, it is necessary to use metadata or request the customer address (data-require-email) to identify the transaction easily in the transaction history.
When the configuration is done
Copy the HTML code displayed at the top of the screen (you can also use the copy button) and paste it in your website.
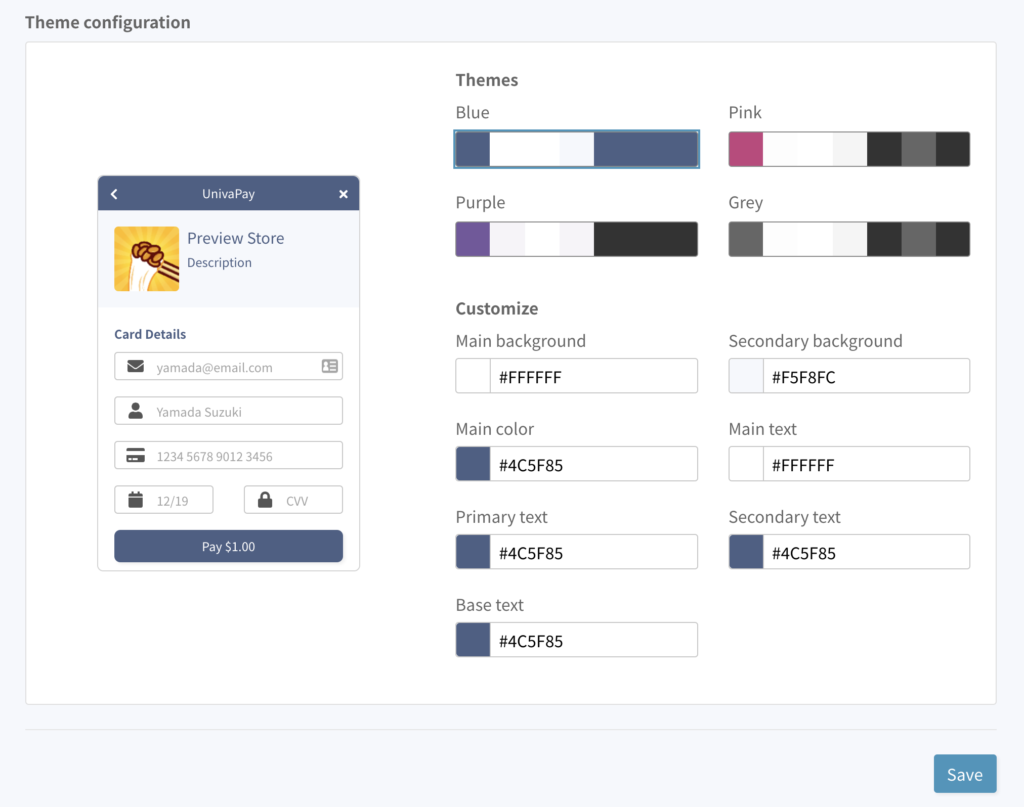
Theme
You can change the colors of the checkout widget.
In theme, you can select a pre-made theme. You can also edit each color if you wish.
Inline checkout
HTML
You can create HTML code for the inline checkout by selecting the options you need.
When the configuration is done
Copy the HTML code displayed at the top of the screen (you can also use the copy button) and paste it in your website.
EC link form
EC form name: it’s an internal reference, it won’t be seen by your customers
App token ID: the Store token ID that will be used to make charges
Payment methods: the payment methods you want to be available on the form
Customer information: the information you want to be required for your customers to enter
Language: by default the form will try to detect the language of the customer’s browser and display accordingly (in Japanese or English), but you can force the language if you prefer
Custom fields: you can change certain labels and add your own fields to the form (for example to request a Customer reference number)
Redirect URL: if you provide a redirect URL, a button redirecting to this URL will appear on the last screen of the EC form, alongside the charge creation or payment result. You can provide a different URL for each result (success, failure or pending).
Theme: you can choose between a light and dark themes, or set your own theme and choose to display your Store name and logo or not