Creating and sharing an EC link form
First you will need to create an EC link form (or select an existing one).
Creating an EC link form
In the EC link form creation page, you can enter a name. If you have multiple stores, you will need to select the one you want to create this form for. and select a store (if you have multiple stores).
Standard charge
If you want to create a form for a standard charge, enter an amount.
Card registration only
If you need the customers to register their card without making a charge, leave the “Amount” field blank, open on “Advanced settings” and make sure that “Save card details” in ON.
Subscription
- Open “Advanced settings”
- Turn “Subscription” ON
- Enter a “Subscription payment” amount
You can also change the cycle and set a start date and an initial payment (optional).
Products
Pre-registered products
When switching “Products” ON, you can select pre-registered products. The EC link form will be automatically set up using the products’ price and details.
- Regular products: you can select multiple products and input the quantity of each product
- Subscription-based products: you can select only one
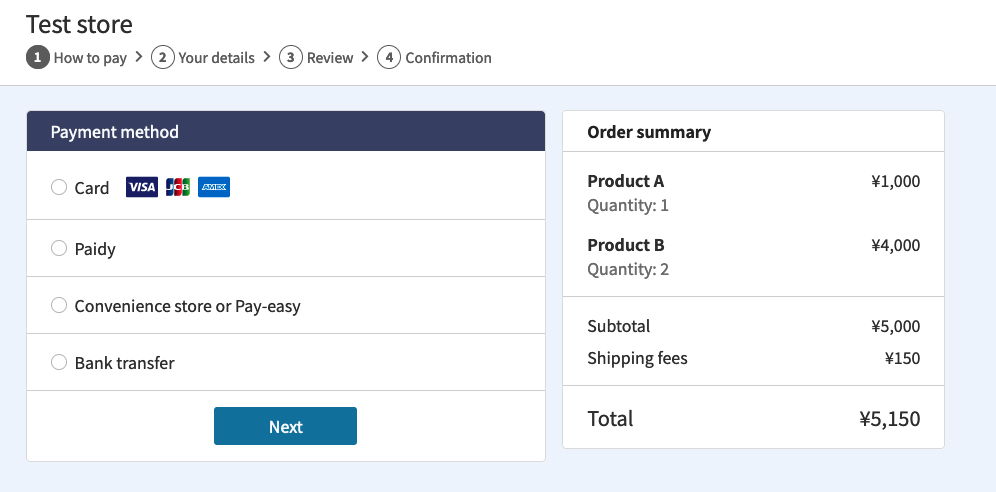
The selected products, quantity and shipping fees will be shown to the customer in the EC link form.


Non-registered products
If you switch “Products” and “Add non-registered products” ON, you can add a product on the fly, which will only be used in that EC link form; this product will not be registered within the main list of products and it cannot be used in another link form. Please note that it is not possible to mix products created on the fly with pre-registered products in the same EC link form.
Other settings (optional)
In “Advanced settings”, you can also set a date on which the link will expire, as well as metadata.
Sending by email (optional)
If you want to send this link to customers straight away, you can do so by clicking on “Add” and adding the email addresses on the text inputs on the left. One email will be sent per email address.
Once you are done, click on “Generate”. This will create the form and send it by email if you entered any email addresses.
Sharing an EC link form
Once you have created an EC link form, you have three ways of getting it to your customers:
- by downloading and sharing the QR code
- by copying and sharing the link
- by sending the link by email directly from the console
You can access all of those features from an EC link form page.
EC form emails
Using the management console to send an EC link form by email will allow you to track if payments have been made by using the link from a specific email.
You send multiple emails at the same time, by clicking on “Add” and adding the email addresses on the text inputs on the left. One email will be sent per email address.
By default the email will be sent by using a template set up by the system, but you can create your own by going to the Templates page and creating an “EC form notification” template.
